If you know me, you know I have a THING for butterflies. If you haven’t noticed, they’re the symbol / logo throughout this website. 🙂 And today I’m sharing that love with my students and turning into an EASY Coffee Filter Butterfly Craft!
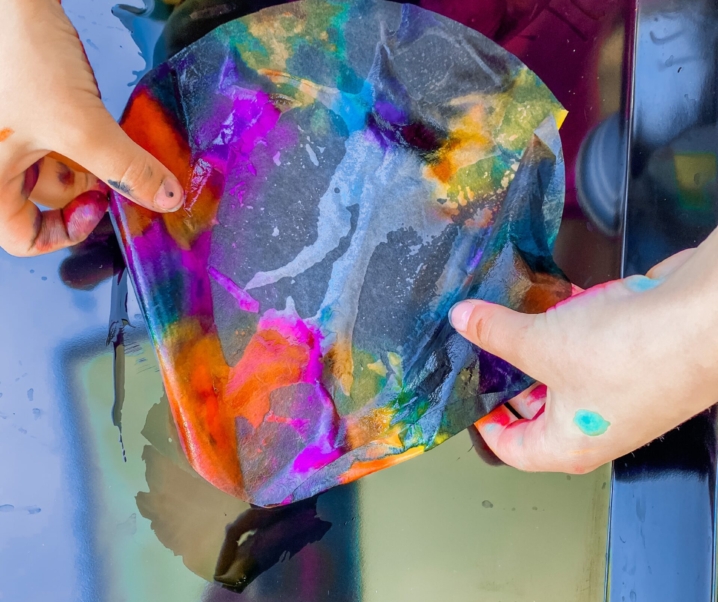
In February I did this tie-dye coffee filter art project with my students and they loved it sooo much and have been asking me if we can do it again ever since!
But if you know anything about me, just like my clothes, I don’t do repeats! 😉 So I looked around a found this really cool take on the tie-dye coffee filters and turned them into butterflies! I also like this one a little more because we just ended up throwing away the coffee filters after the first project. And this way they got to keep it as something cool!
The steps with this project at the beginning are the same as with the coffee filter art project before with designing coffee filters with washable markers.
ALL YOU’LL NEED IS:
- Tray
- Pipette
- Cup of Water
- Washable Markers
- 4 Coffee Filters
- 2 Pipe cleaners
The difference between this project and the previous one is that when you’re dropping the water onto the coffee filters, you have to put an ADDITIONAL blank second coffee filter underneath so that the colors transfer through. This way you come out with TWO coffee filters at one time.
I had the kids repeat this process one more time (aka color in one more coffee filter and wet an additional one with it) so that altogether they had 4 coffee filters to make 2 butterflies. I thought making two would be nice to have and I said they could make them as “friendship butterflies” and give one to someone they love. 🙂 You need two coffee filters per butterfly.
The next steps are better explained through this great YouTube video I found so click here to see how you combine to turn into a BUTTERFLY and VOILA, THIS IS HOW THEY TURNED OUT!
Let me know your thoughts on this activity if you do it with your students/kids and tag me on Instagram @elainechaya with any pictures so I can repost!


