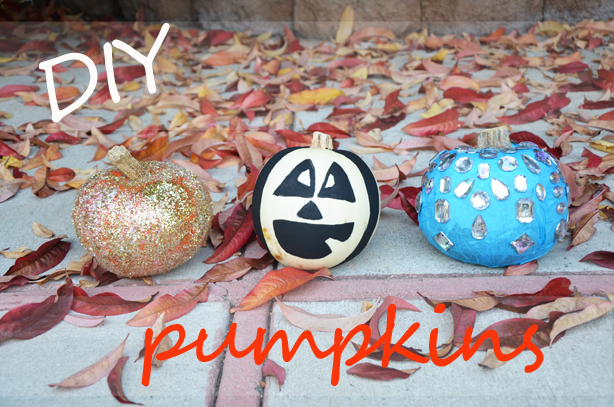
If you’re anything like me, you can’t carve a pumpkin to save your life. How do people do such cool and intense designs?! I will never know. But obviously super into the Halloween and Thanksgiving Pumpkin spirit, I still want to be apart of the cool crowd and have some pumpkins of my own that I can decorate. So I decided to spin the good ole pumpkin carving idea in a different light and show you Fashionlainers how to make three really cute DIY pumpkins that will last you all the way through Thanksgiving.

WHAT YOU’LL NEED:
>> Pumpkins (get as many as you want to decorate)
>> Aleen’s Tacky Glue
>> Glitter (as many colors as you want)
>> Paint Brushes (one thicker one, I use a sponge brush, and one thinner one)
>> Black Acrylic Paint
>> Tissue Paper
>> Pencil
>> Bejeweled Stones
**You can find these materials at any arts and crafts store, I got most of mine from Michaels but they aren’t all up on their website**


To go along with the idea of carving pumpkins, I decided that I was going to paint the face on one of them. I decided to go with a white pumpkin here so that it would have a cooler effect against the black paint.
1) Grab your pencil, paintbrush, black paint, and white pumpkin
2) Start tracing the face in pencil (pencil is good for when you mess up so you can just erase and redo)
3) Start filling in your trace with black paint and a thin paint brush
4) Grab a thicker paint brush to make thick black lines throughout the remainder of the pumpkin


I thought it would be fun to make a glittery pumpkin. I got both a white and a gold glitter to do a mixed effect, but you can grab whatever colors speak to you.
1) Grab your Tacky Glue, glitter, thick paintbrush, and pumpkin
2) Start applying the Tacky Glue on the pumpkin surface
3) Pour your glitter combination on the glued surface (I poured the different glitters together in a cup and mixed together so that when I poured onto the pumpkin it had both colors)
4) Roll the pumpkin back and forth on the newspaper so that you grab as much glitter as possible (then rinse & repeat throughout the rest of the pumpkin)


When I took this pumpkin out of the bag when I got home, it suddenly had a lot of holes, looking battled and wounded. So I decided that I was going to cover it up and bejewel it, making it the prettiest pumpkin yet.
1) Grab Tacky Glue, a thick paintbrush, tissue paper, stones, and your pumpkin
2) Start applying the Tacky Glue onto the pumpkin surface
3) Wrap tissue paper onto the glued surface
4) Continue adding Tacky Glue on the remainder of the pumpkin as you add tissue paper
5) Reapply tissue paper to create a second layer (I did two layers of tissue paper to give it a more bright blue effect)
6) Apply Tacky Glue onto the stones and start bejeweling your pumpkin!


